Quickstart
This document gives you a quick view on the basic usage of Submarine platform. You can finish each step of ML model lifecycle on the platform without messing up with the troublesome environment problems.
Installation
Prepare a Kubernetes cluster
- Prerequisite
- Check dependency page for the compatible version
- kubectl
- helm (Helm v3 is minimum requirement.)
- minikube.
- Start minikube cluster
$ minikube start --vm-driver=docker --cpus 8 --memory 4096 --kubernetes-version v1.15.11
Launch submarine in the cluster
- Clone the project
$ git clone https://github.com/apache/submarine.git
- Install the resources by helm chart
$ cd submarine
$ helm install submarine ./helm-charts/submarine
Ensure submarine is ready
- Use kubectl to query the status of pods
$ kubectl get pods
- Make sure each pod is
Running
NAME                                              READY   STATUS    RESTARTS   AGE
notebook-controller-deployment-5d4f5f874c-vwds8   1/1     Running   0          3h33m
pytorch-operator-844c866d54-q5ztd                 1/1     Running   0          3h33m
submarine-database-674987ff7d-r8zqs               1/1     Running   0          3h33m
submarine-minio-5fdd957785-xd987                  1/1     Running   0          3h33m
submarine-mlflow-76bbf5c7b-g2ntd                  1/1     Running   0          3h33m
submarine-server-66f7b8658b-sfmv8                 1/1     Running   0          3h33m
submarine-tensorboard-6c44944dfb-tvbr9            1/1     Running   0          3h33m
submarine-traefik-7cbcfd4bd9-4bczn                1/1     Running   0          3h33m
tf-job-operator-6bb69fd44-mc8ww                   1/1     Running   0          3h33m
Connect to workbench
- Port-forwarding
# using port-forwarding
$ kubectl port-forward --address 0.0.0.0 service/submarine-traefik 32080:80
- Open
http://0.0.0.0:32080
Example: Submit a mnist distributed example
We put the code of this example here. train.py is our training script, and build.sh is the script to build a docker image.
1. Write a python script for distributed training
Take a simple mnist tensorflow script as an example. We choose MultiWorkerMirroredStrategy as our distributed strategy.
"""
./dev-support/examples/quickstart/train.py
Reference: https://github.com/kubeflow/tf-operator/blob/master/examples/v1/distribution_strategy/keras-API/multi_worker_strategy-with-keras.py
"""

import tensorflow_datasets as tfds
import tensorflow as tf
from tensorflow.keras import layers, models
from submarine import ModelsClient

def make_datasets_unbatched():
  BUFFER_SIZE = 10000

  # Scaling MNIST data from (0, 255] to (0., 1.]
  def scale(image, label):
    image = tf.cast(image, tf.float32)
    image /= 255
    return image, label

  datasets, _ = tfds.load(name='mnist', with_info=True, as_supervised=True)

  return datasets['train'].map(scale).cache().shuffle(BUFFER_SIZE)


def build_and_compile_cnn_model():
  model = models.Sequential()
  model.add(
      layers.Conv2D(32, (3, 3), activation='relu', input_shape=(28, 28, 1)))
  model.add(layers.MaxPooling2D((2, 2)))
  model.add(layers.Conv2D(64, (3, 3), activation='relu'))
  model.add(layers.MaxPooling2D((2, 2)))
  model.add(layers.Conv2D(64, (3, 3), activation='relu'))
  model.add(layers.Flatten())
  model.add(layers.Dense(64, activation='relu'))
  model.add(layers.Dense(10, activation='softmax'))

  model.summary()

  model.compile(optimizer='adam',
                loss='sparse_categorical_crossentropy',
                metrics=['accuracy'])

  return model

def main():
  strategy = tf.distribute.experimental.MultiWorkerMirroredStrategy(
      communication=tf.distribute.experimental.CollectiveCommunication.AUTO)

  BATCH_SIZE_PER_REPLICA = 4
  BATCH_SIZE = BATCH_SIZE_PER_REPLICA * strategy.num_replicas_in_sync

  with strategy.scope():
    ds_train = make_datasets_unbatched().batch(BATCH_SIZE).repeat()
    options = tf.data.Options()
    options.experimental_distribute.auto_shard_policy = \
        tf.data.experimental.AutoShardPolicy.DATA
    ds_train = ds_train.with_options(options)
    # Model building/compiling need to be within `strategy.scope()`.
    multi_worker_model = build_and_compile_cnn_model()

  class MyCallback(tf.keras.callbacks.Callback):
    def on_epoch_end(self, epoch, logs=None):
      # monitor the loss and accuracy
      print(logs)
      modelClient.log_metrics({"loss": logs["loss"], "accuracy": logs["accuracy"]}, epoch)

  with modelClient.start() as run:
    multi_worker_model.fit(ds_train, epochs=10, steps_per_epoch=70, callbacks=[MyCallback()])


if __name__ == '__main__':
  modelClient = ModelsClient()
  main()
2. Prepare an environment compatible with the training
Build a docker image equipped with the requirement of the environment.
$ ./dev-support/examples/quickstart/build.sh
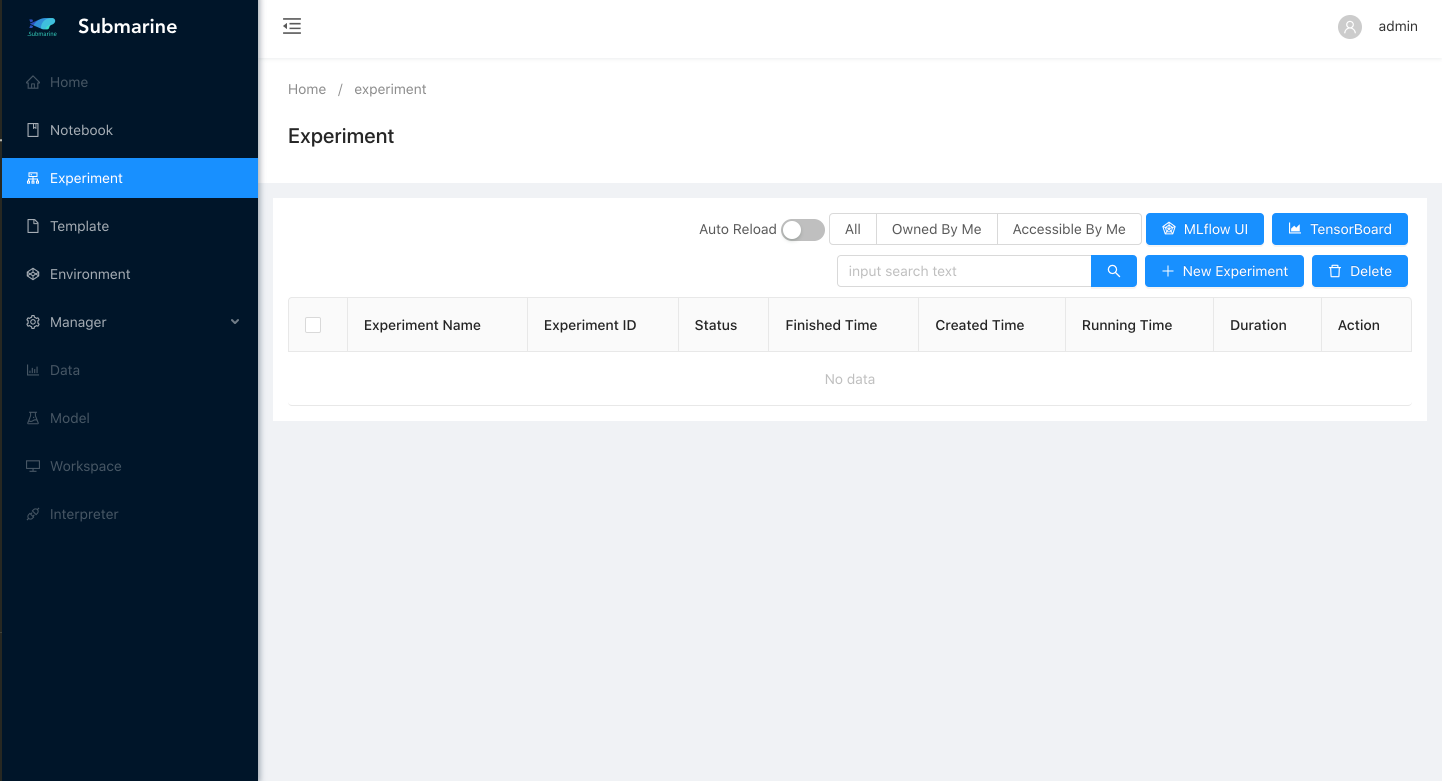
3. Submit the experiment
Open submarine workbench and click
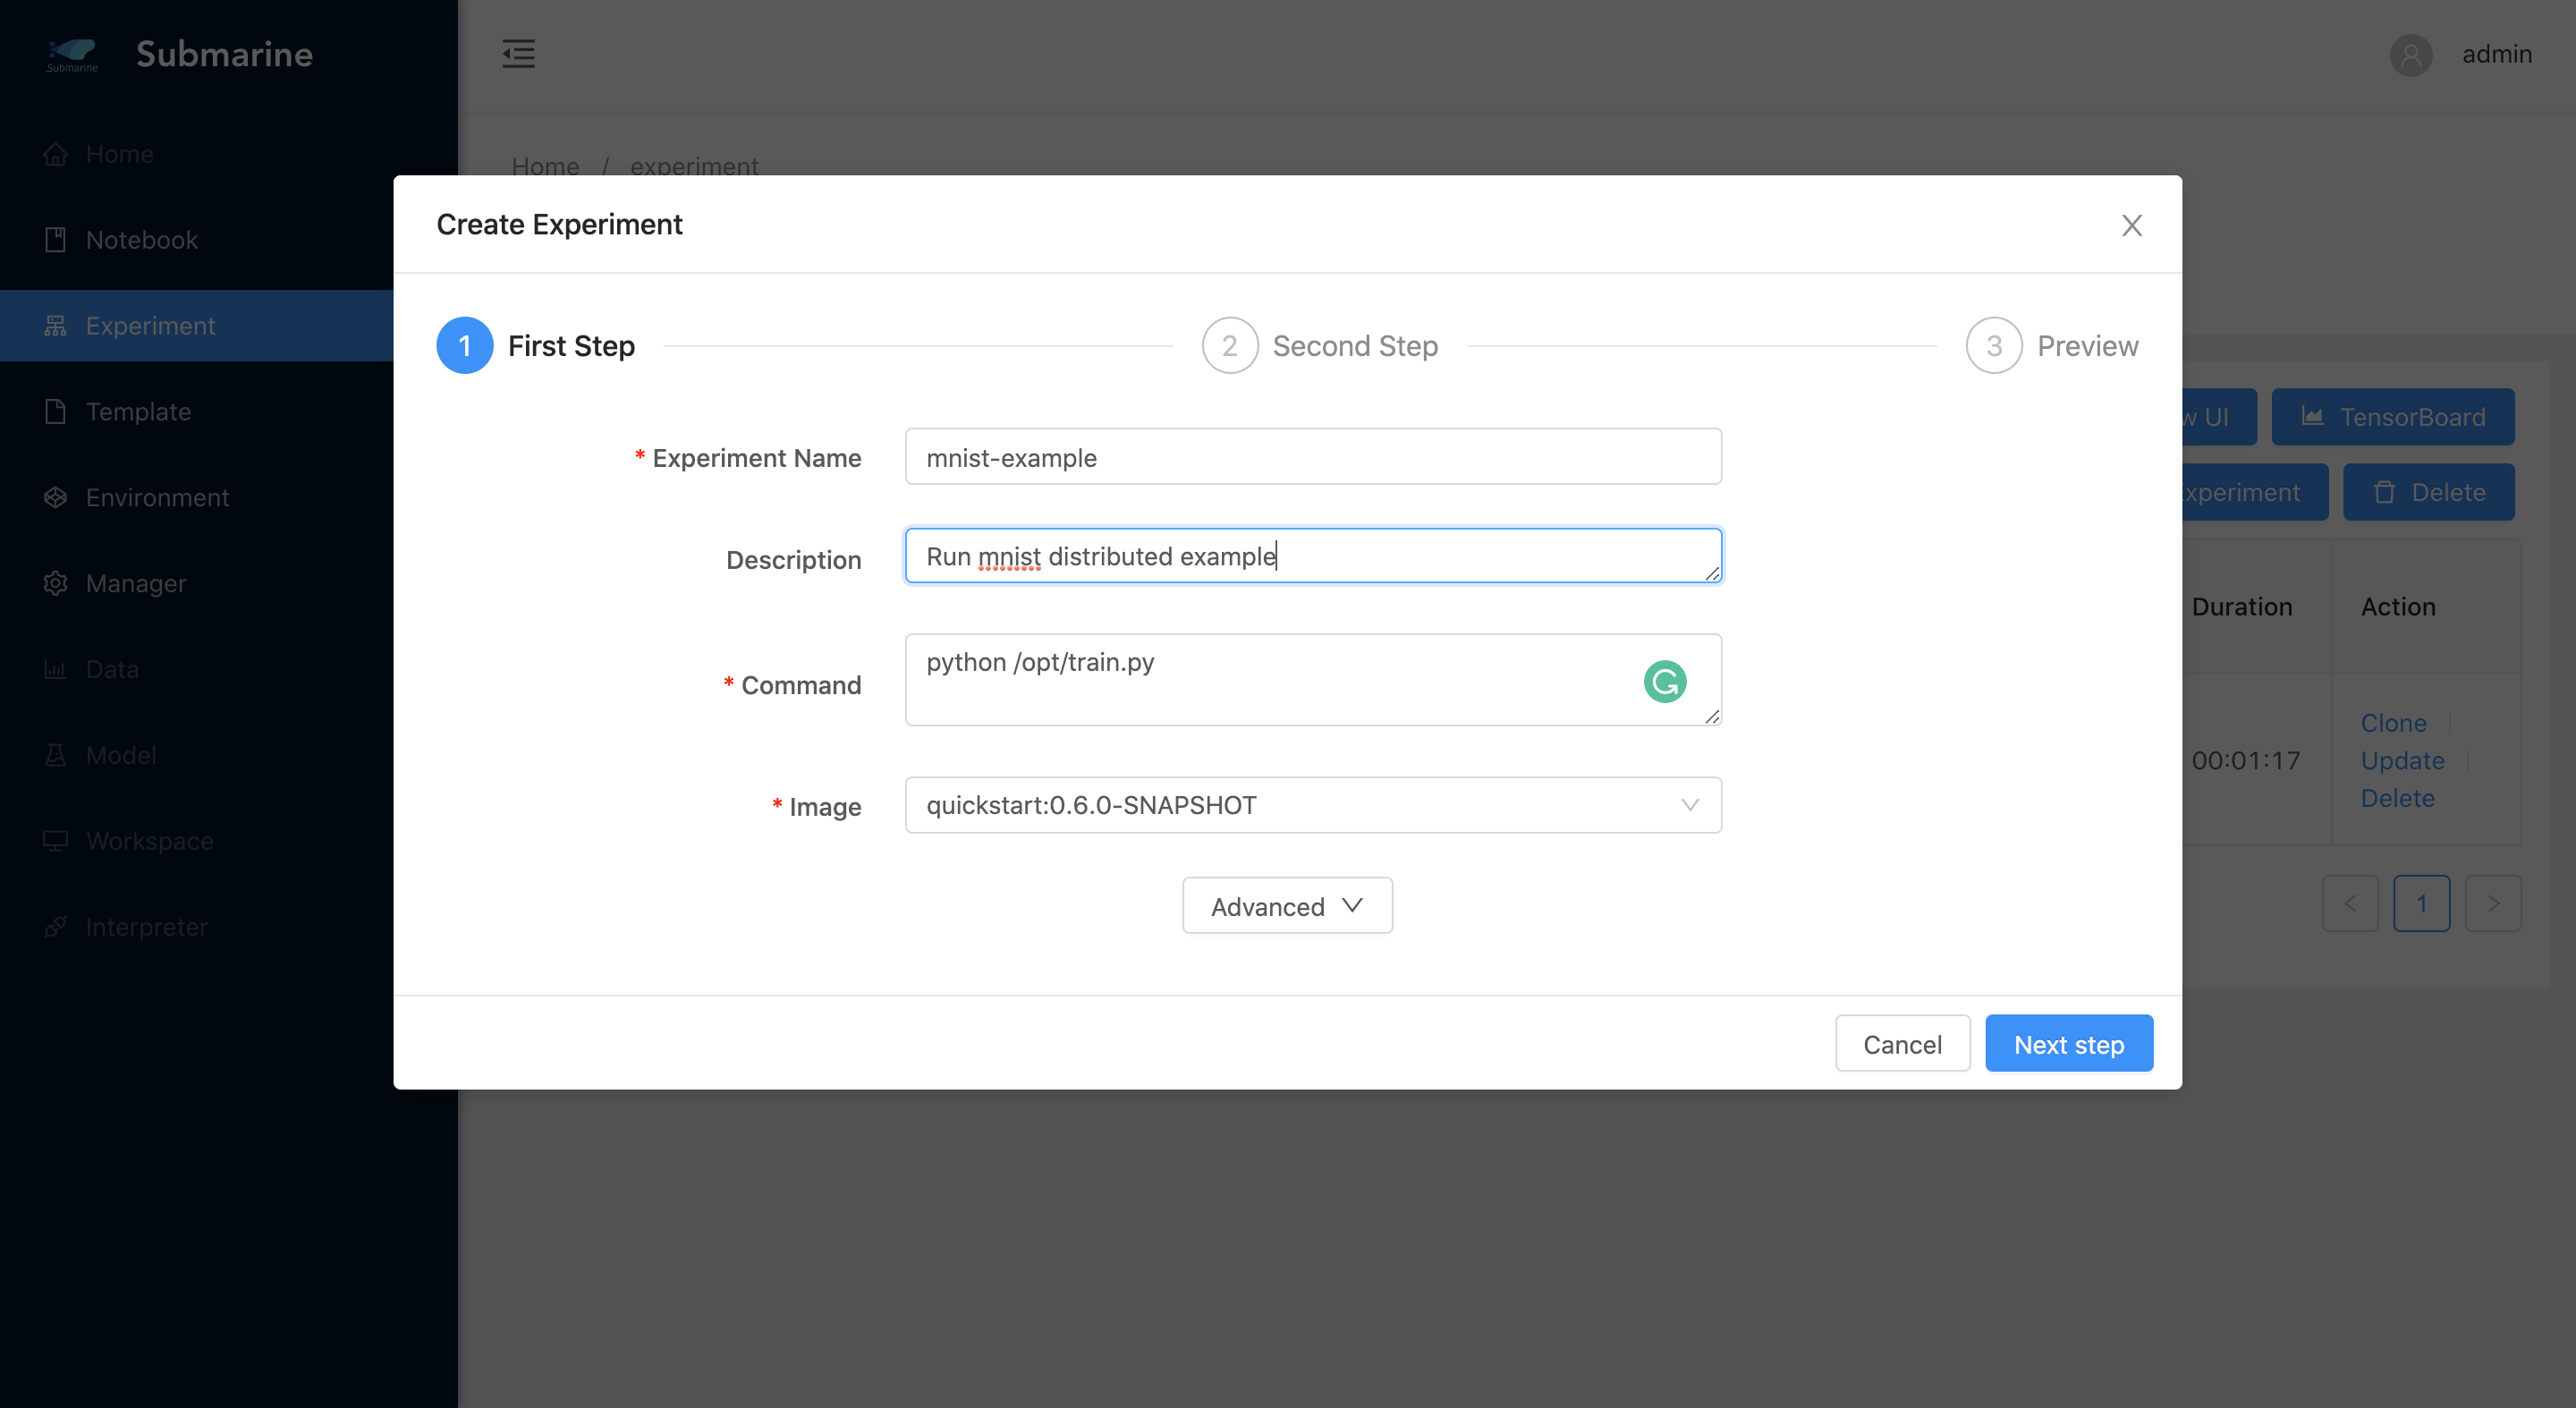
+ New ExperimentFill the form accordingly. Here we set 3 workers.
- Step 1
- Step 2
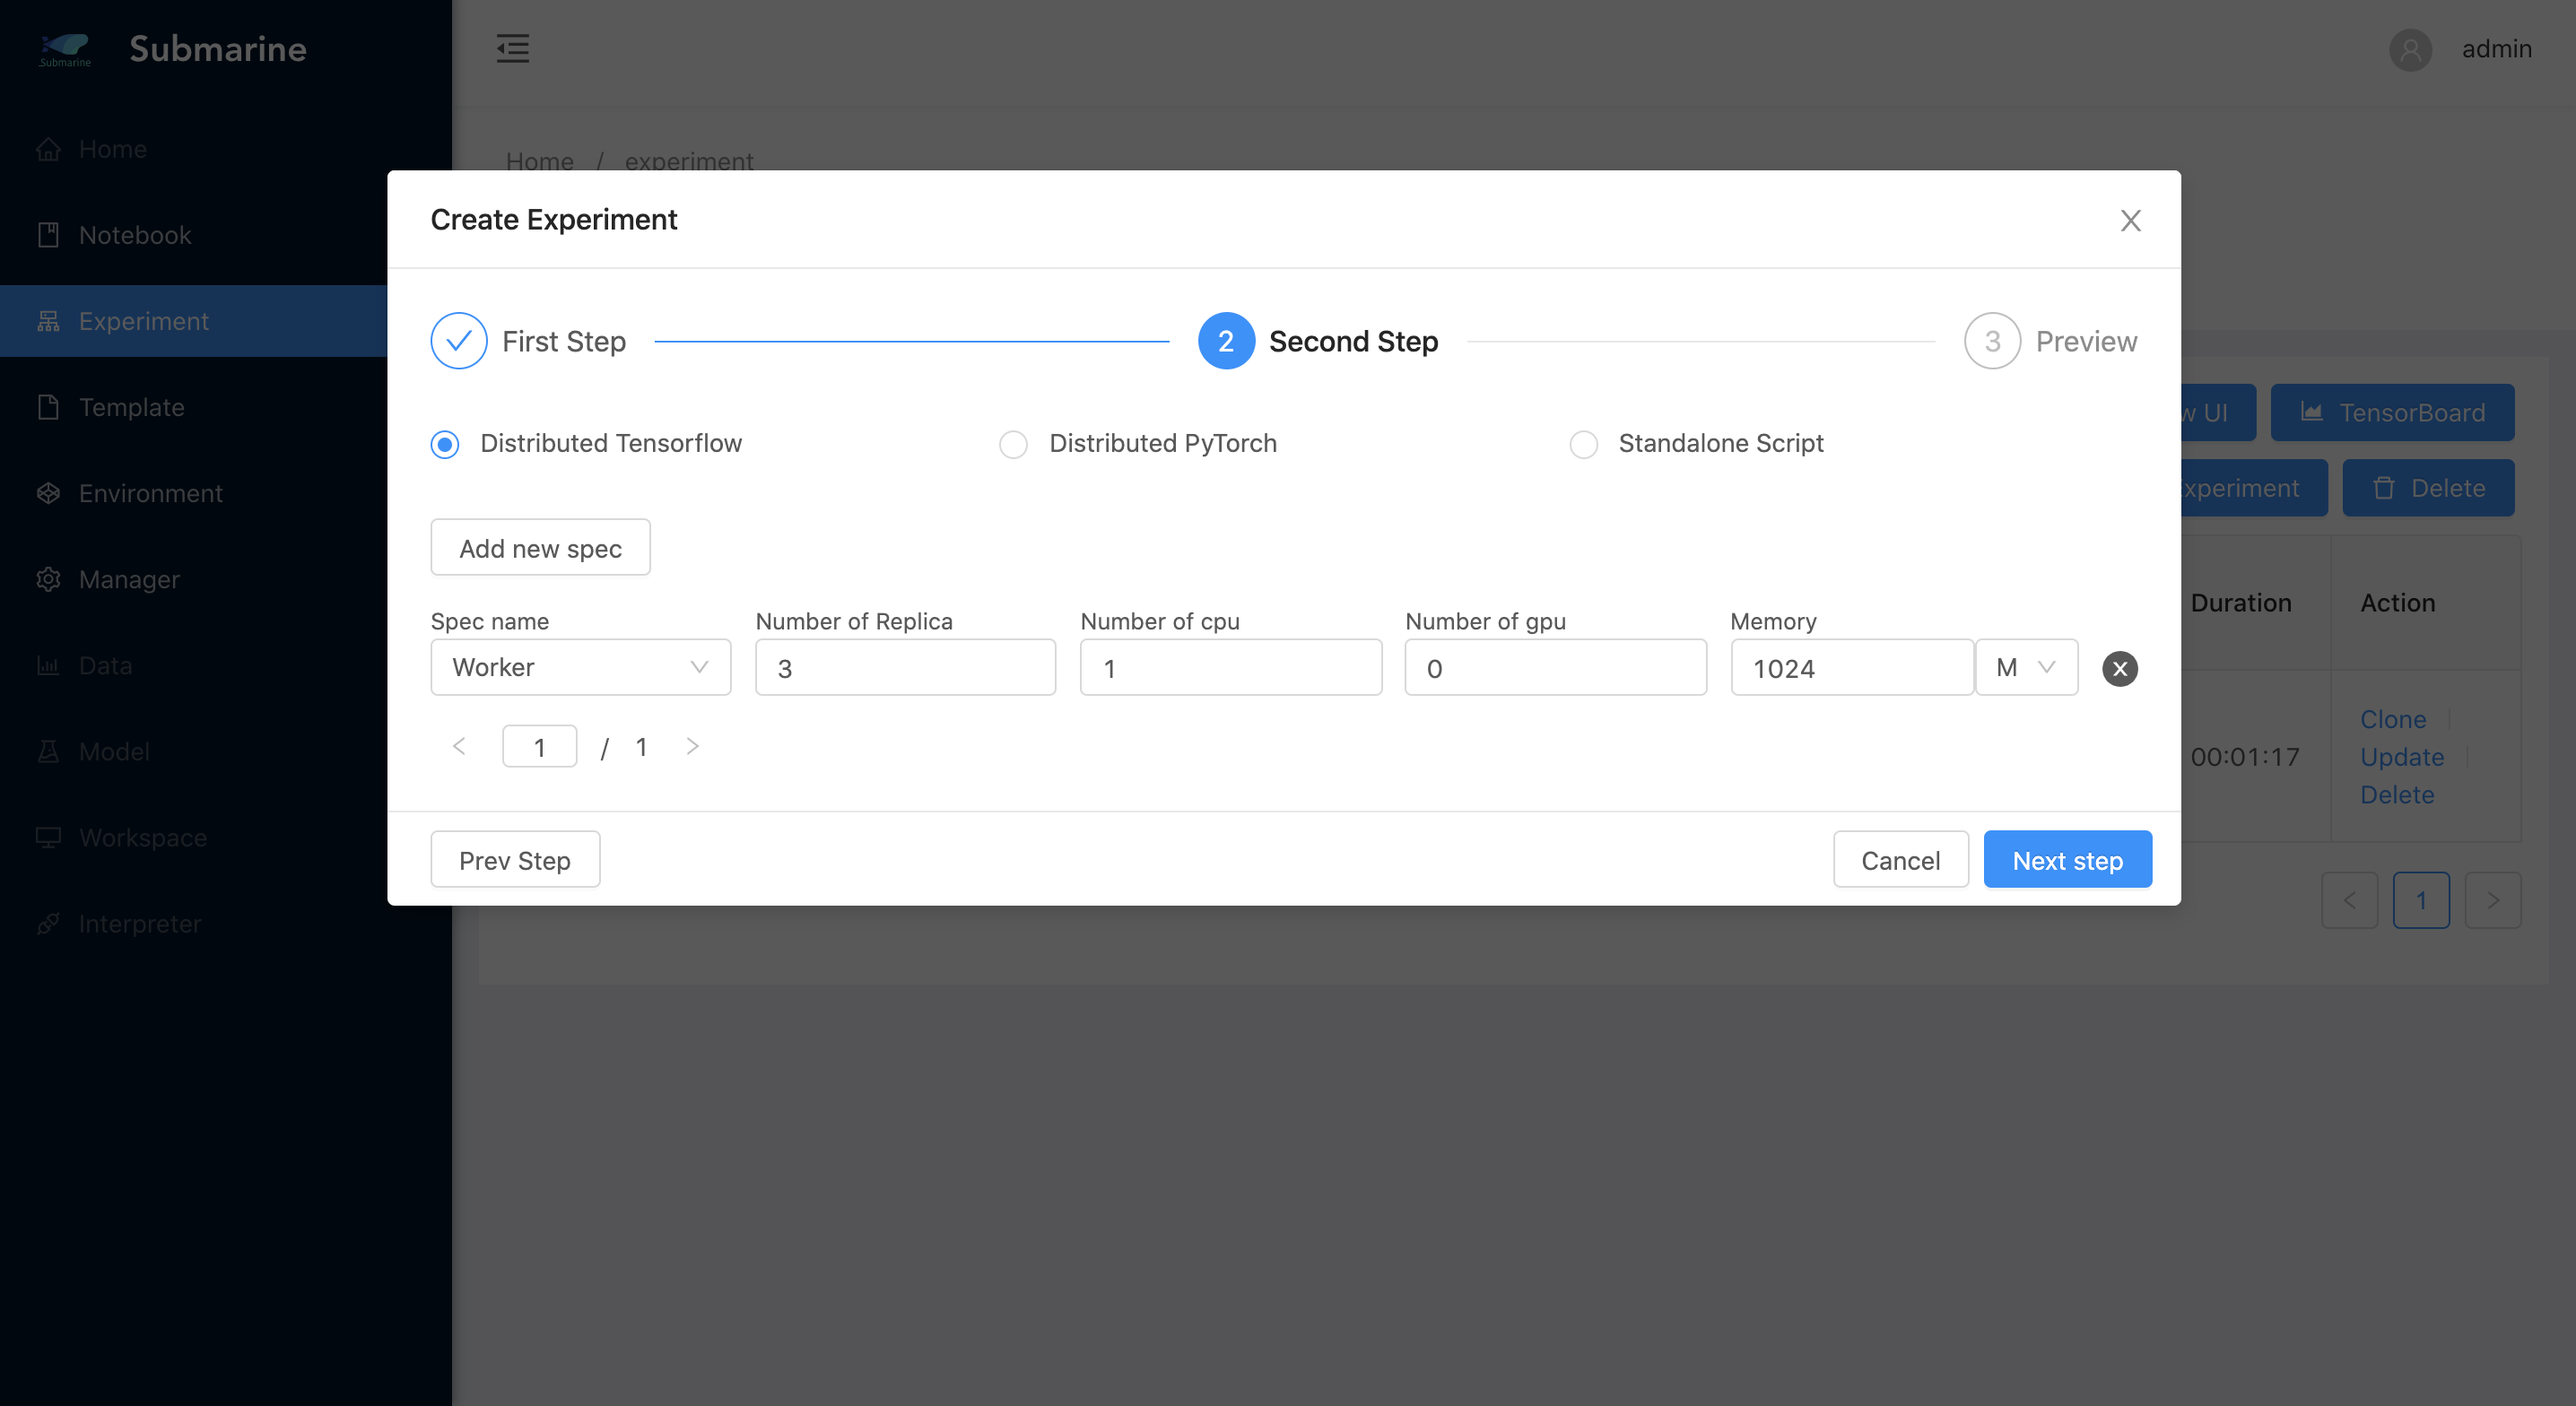
- Step 3
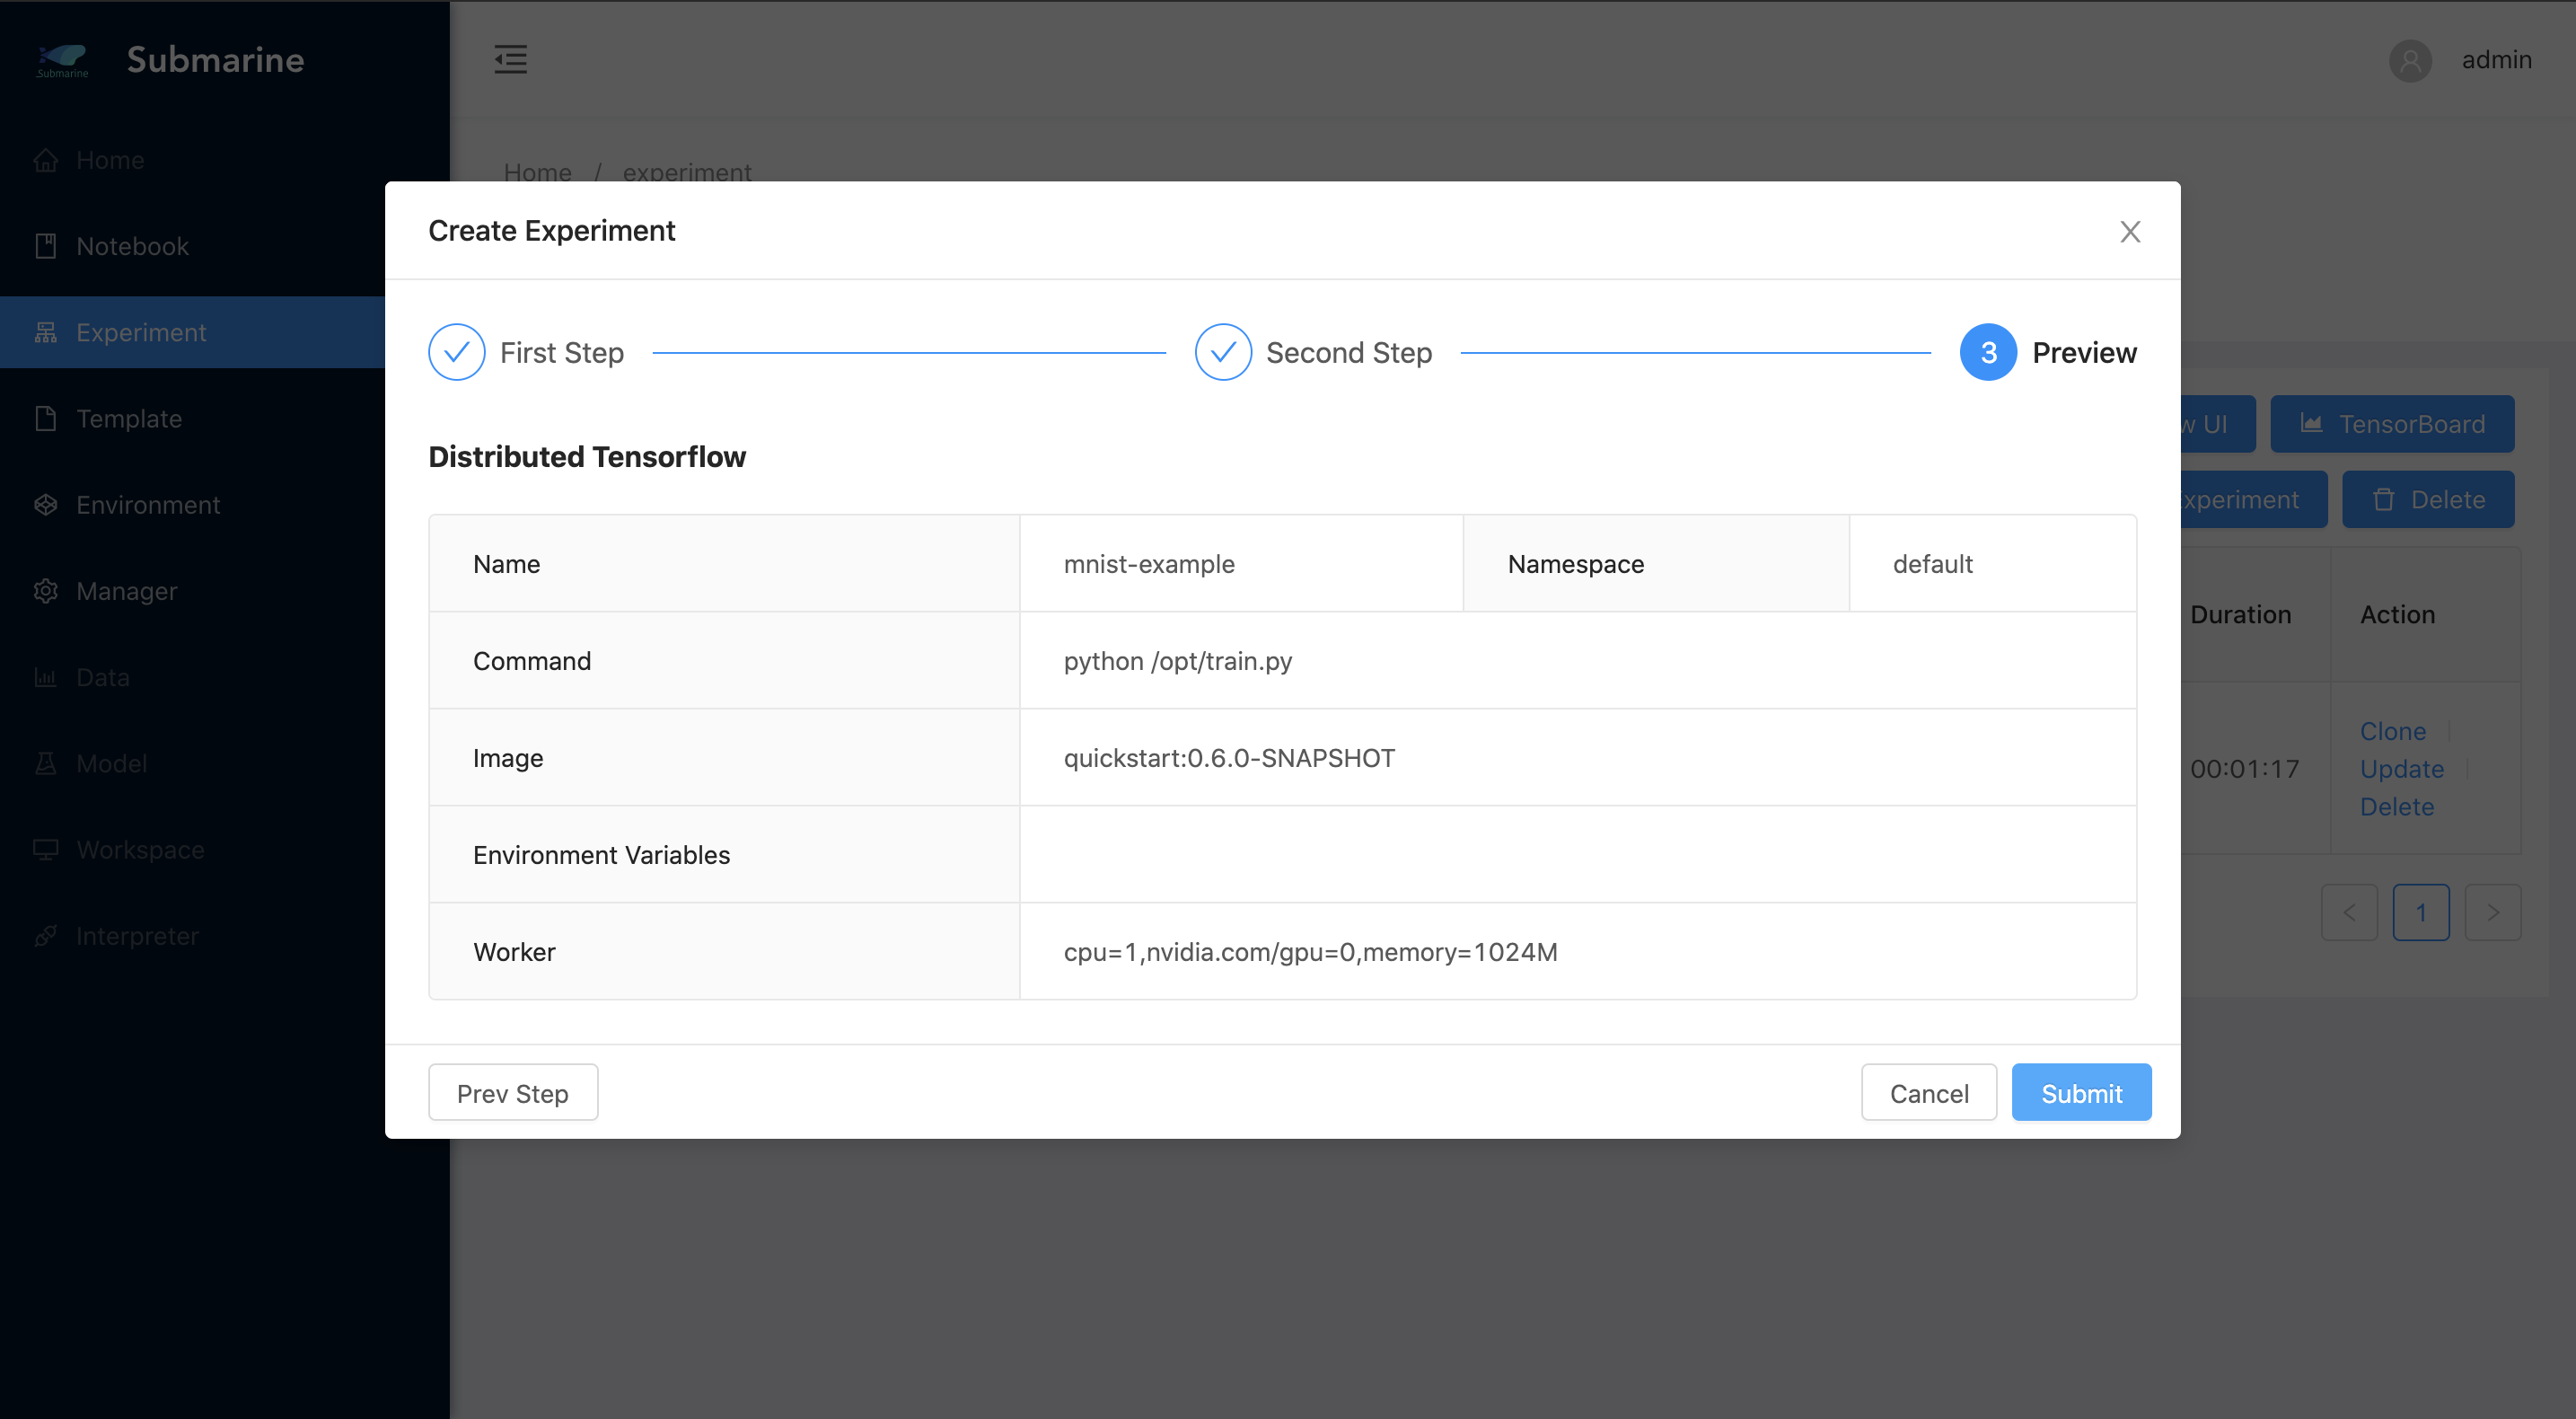
- The experiment is successfully submitted
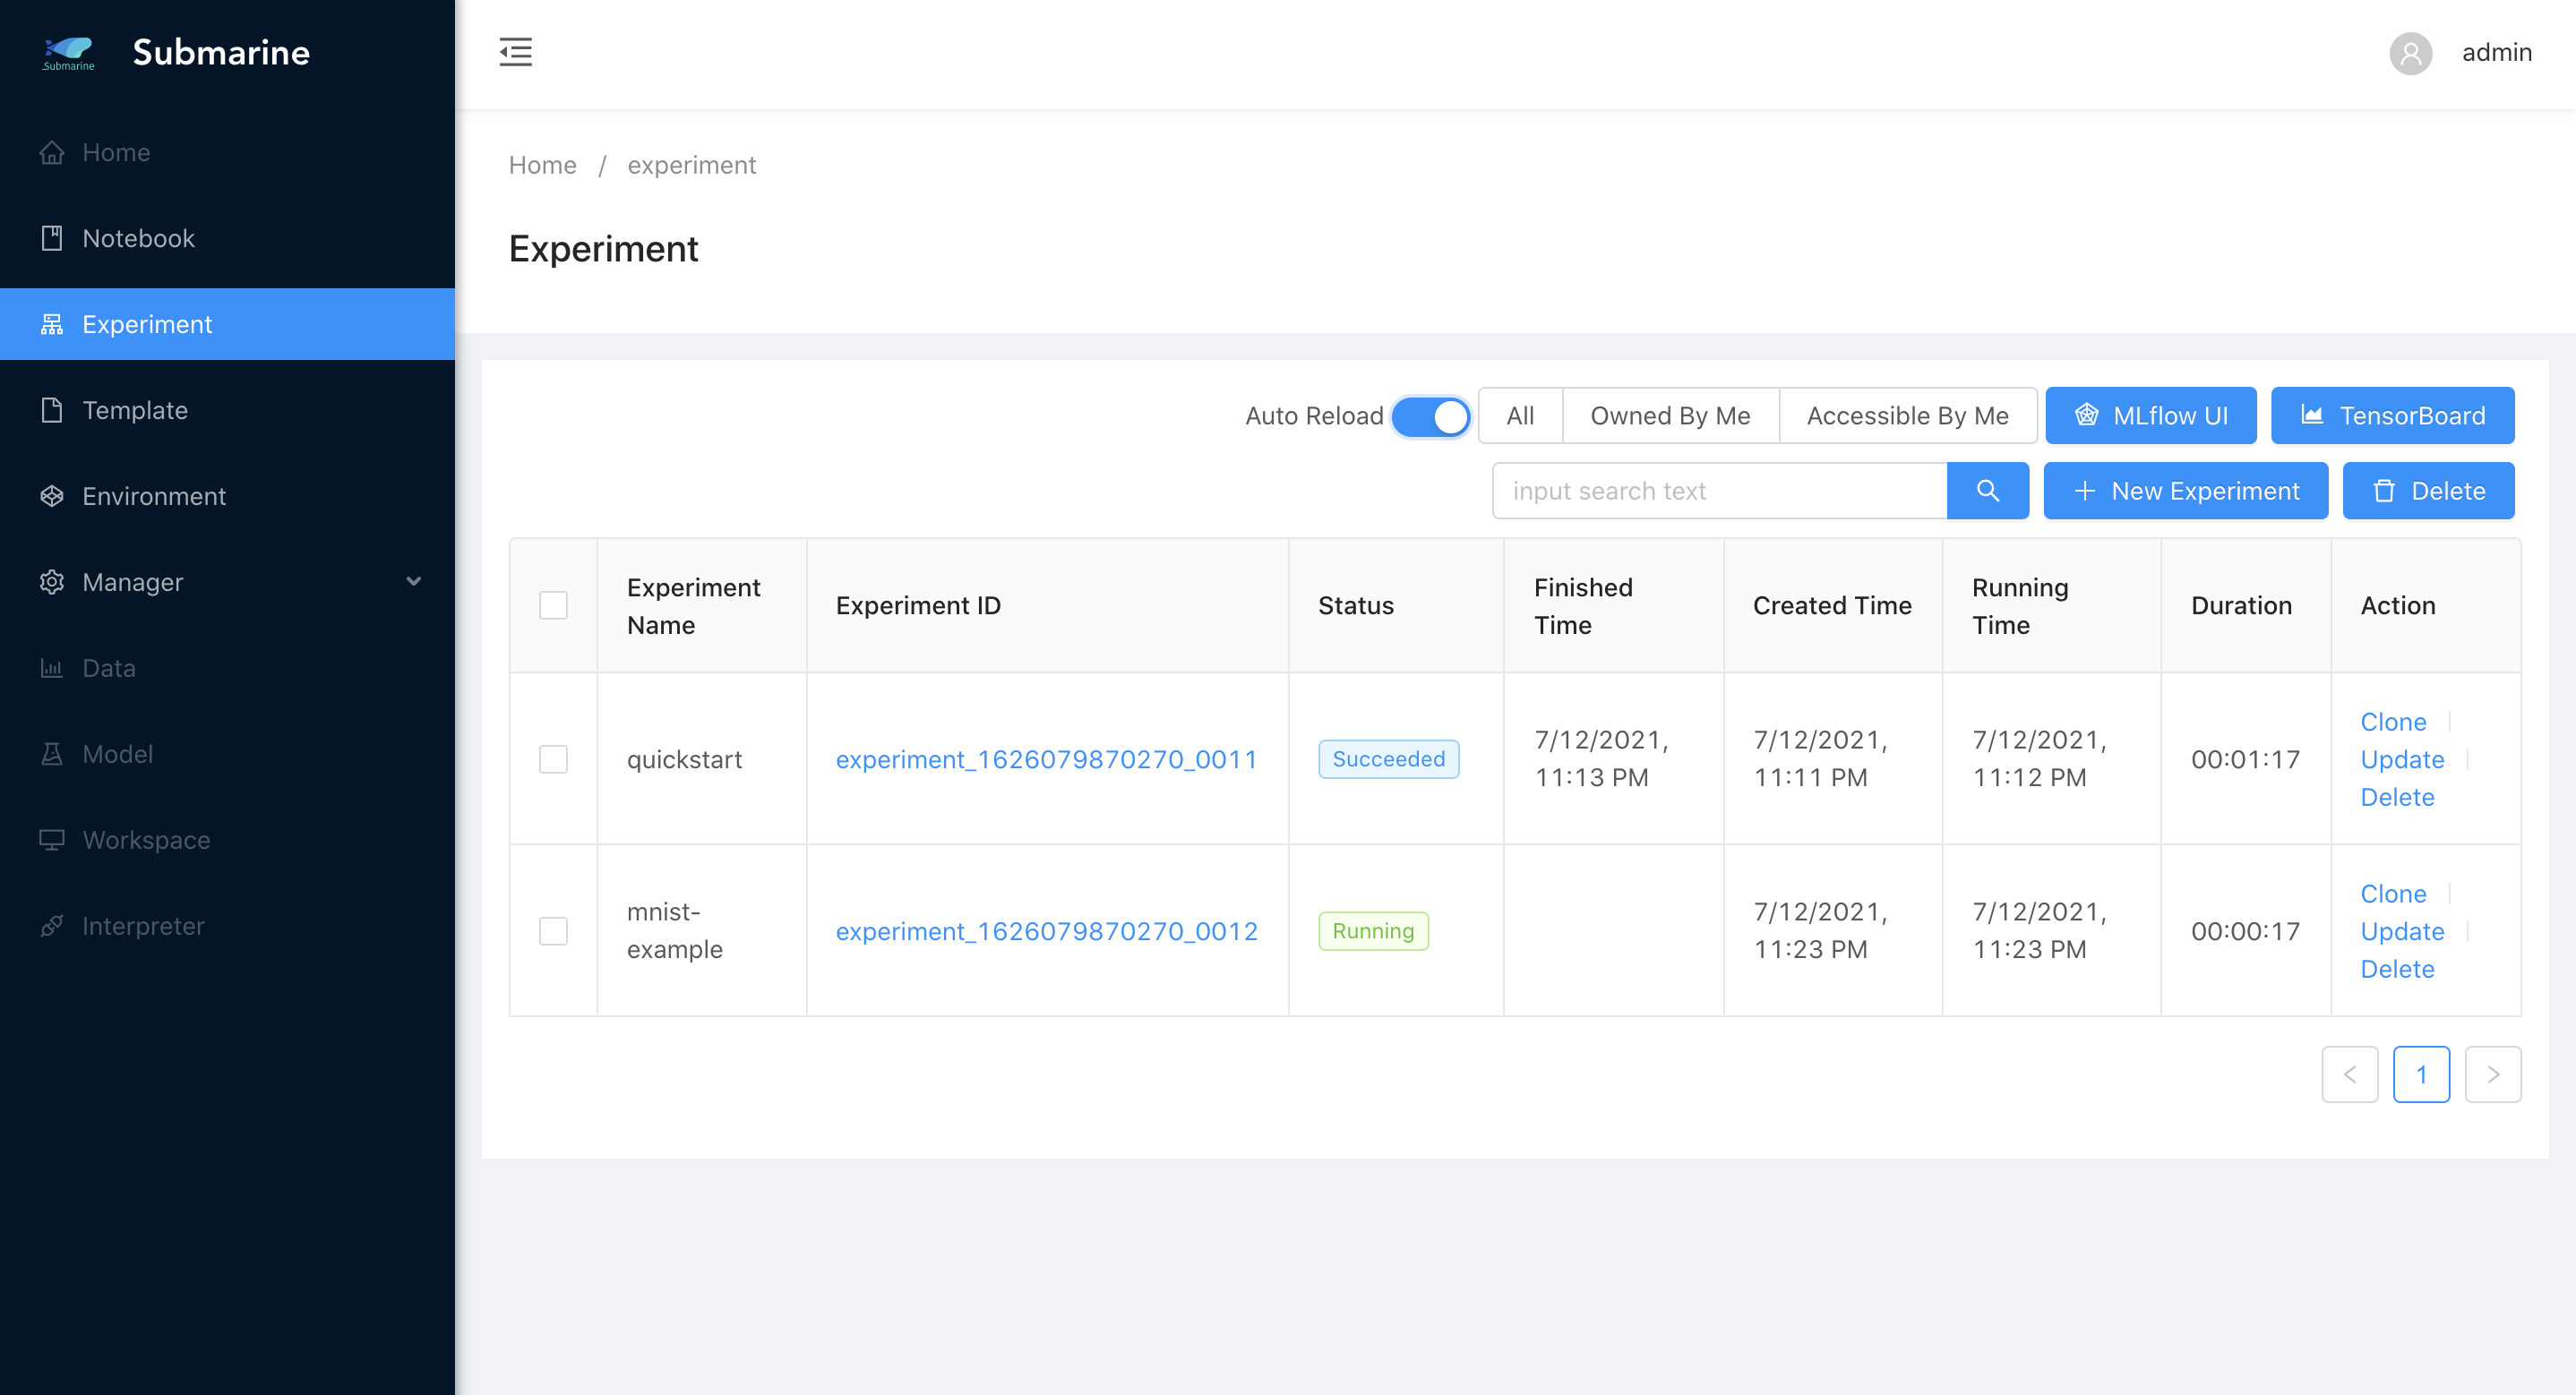
- Step 1
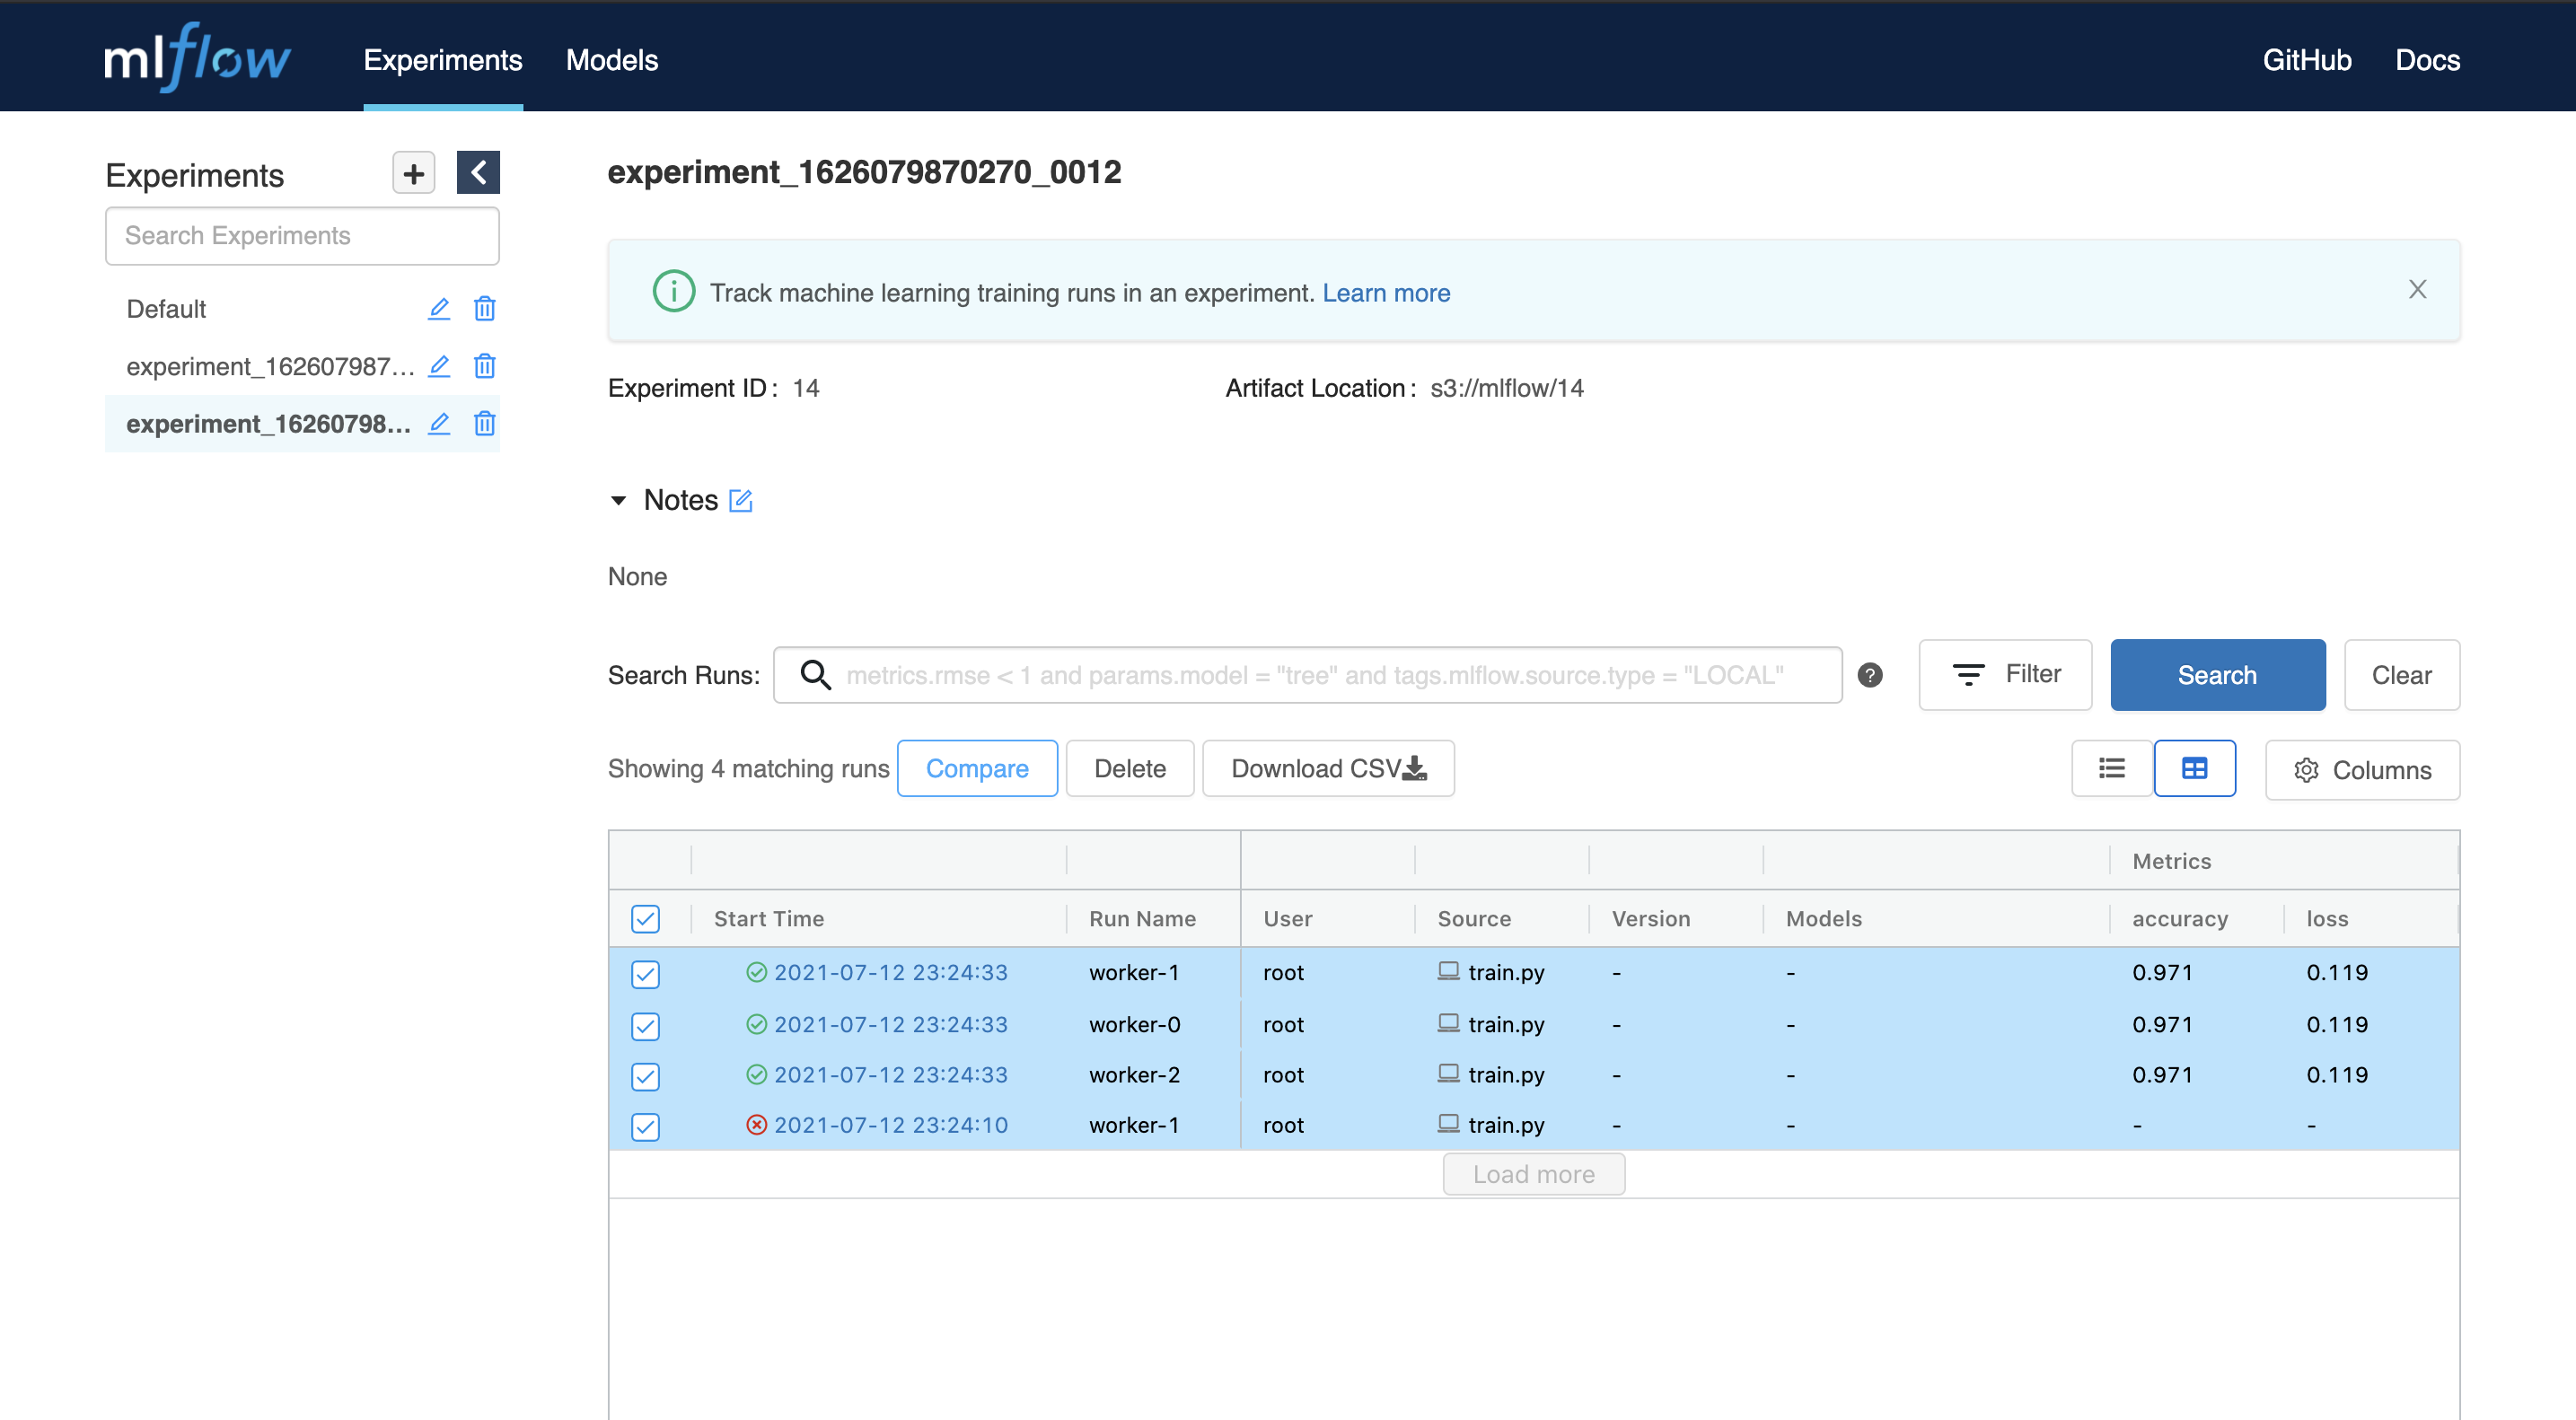
4. Monitor the process (modelClient)
In our code, we use
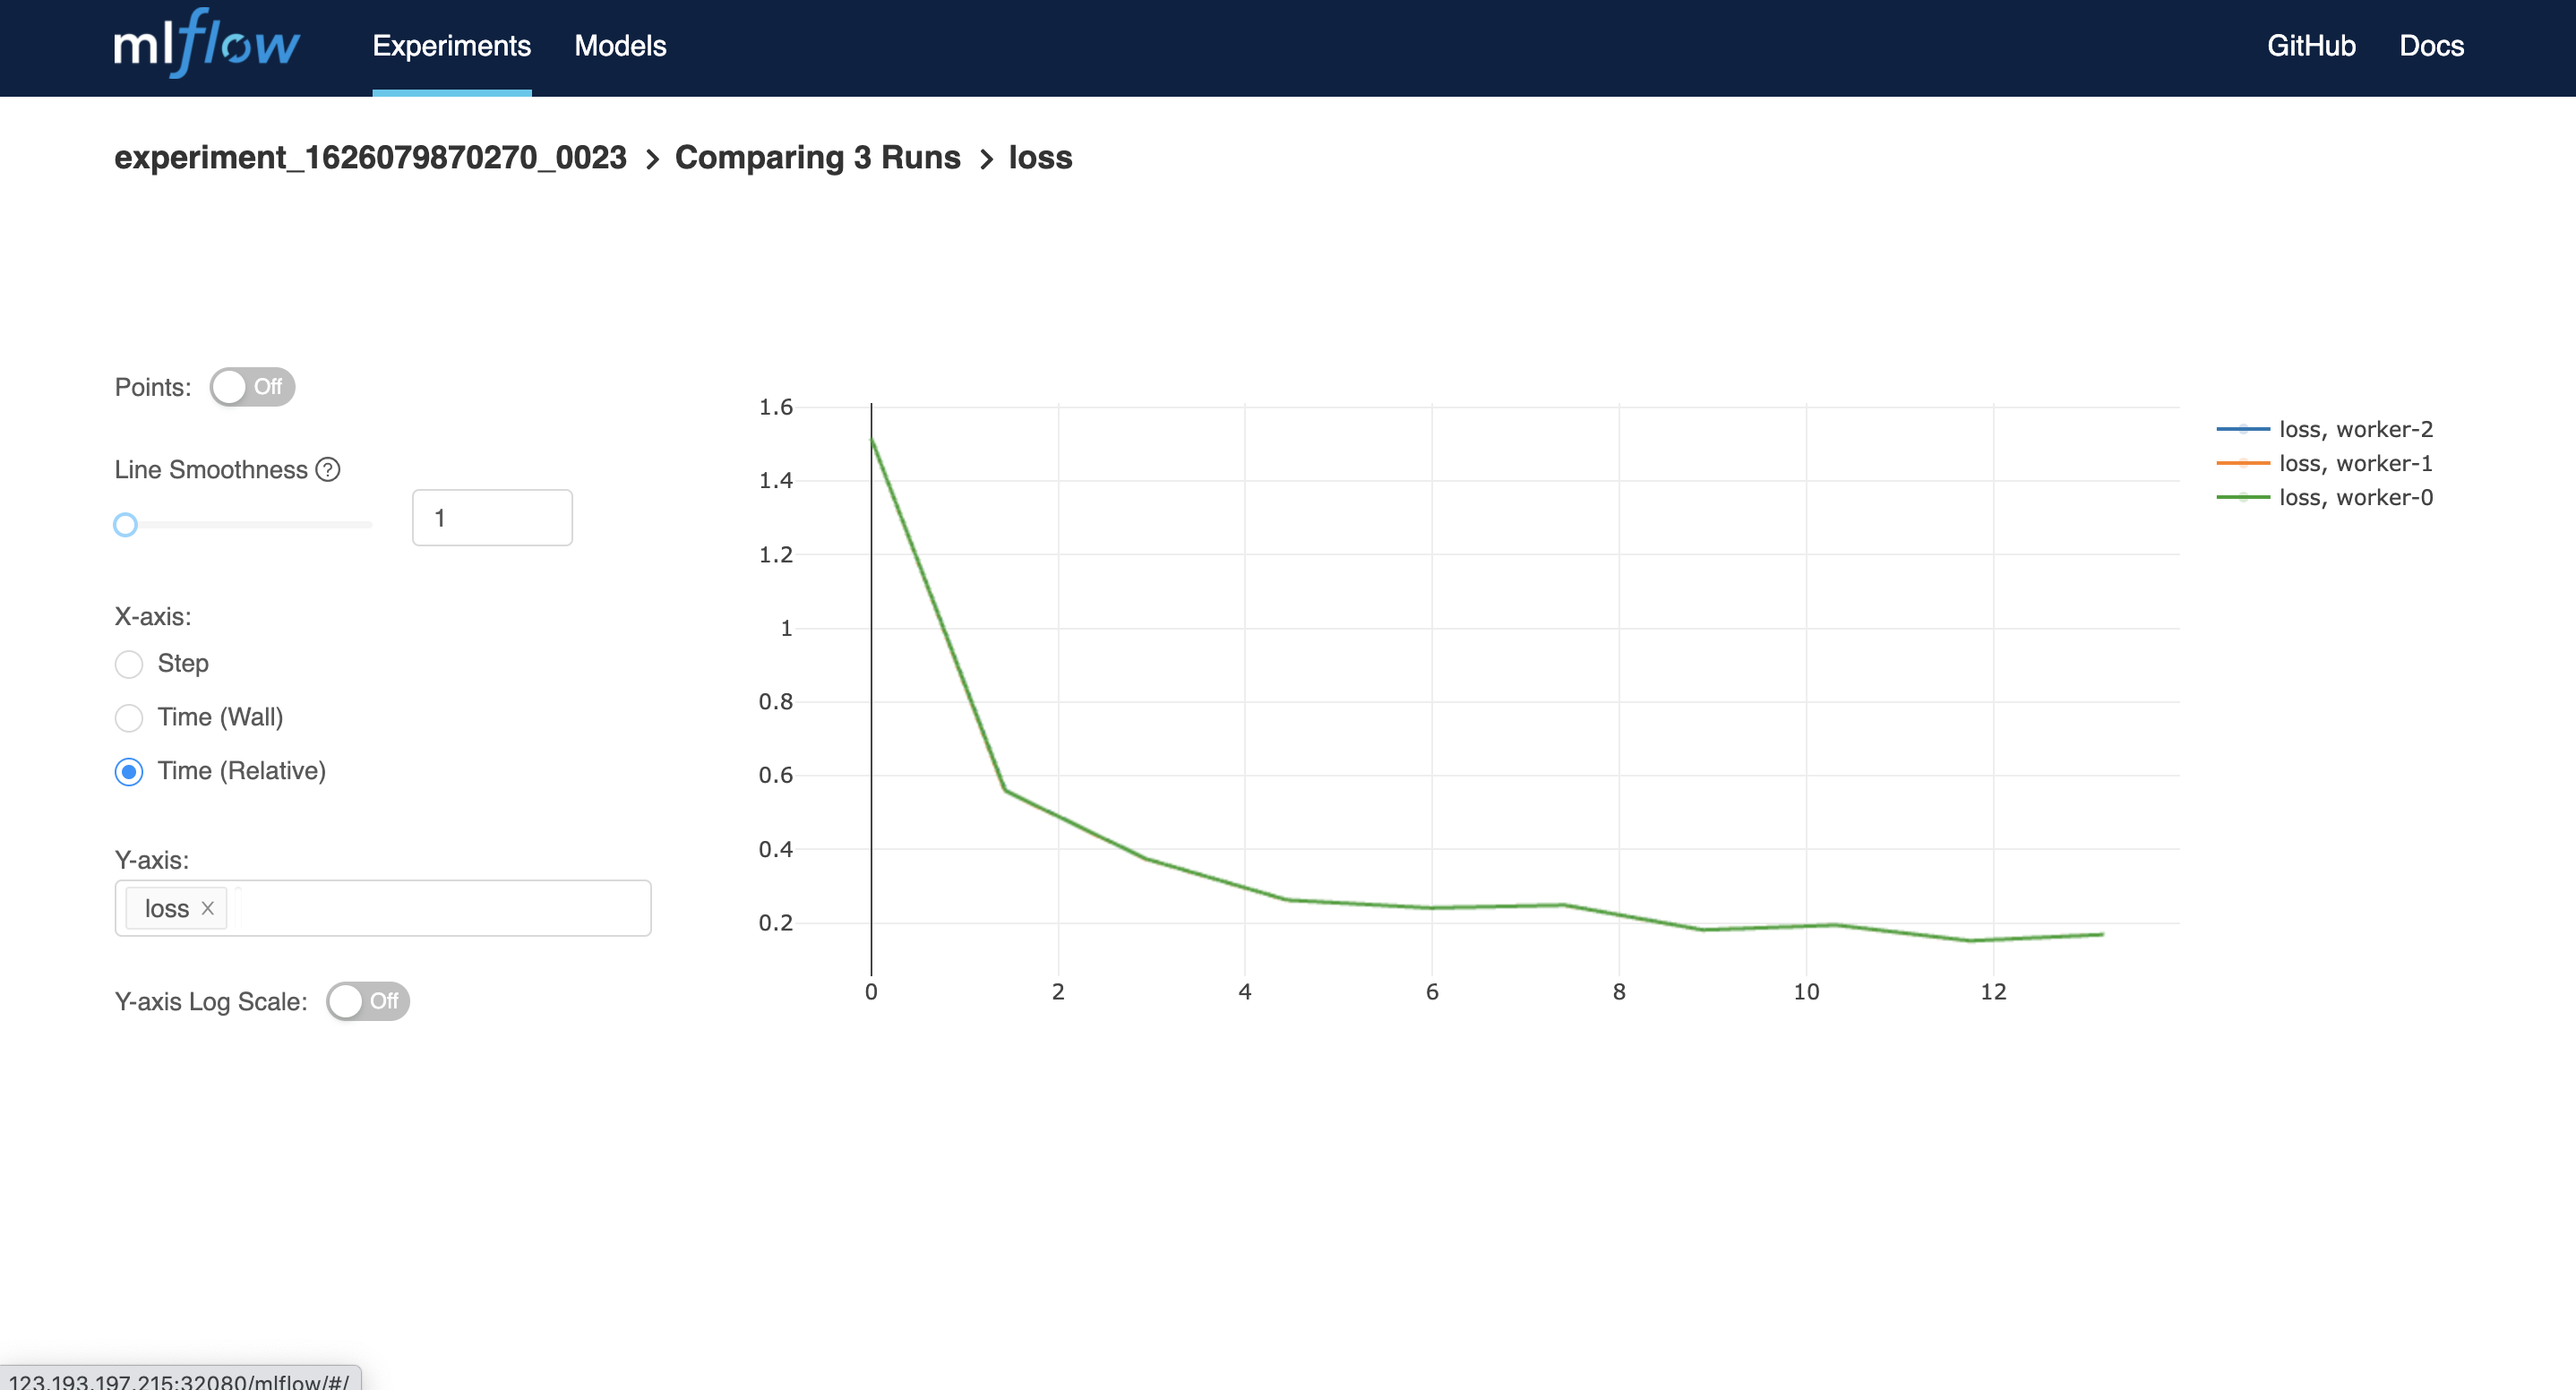
modelClientfromsubmarine-sdkto record the metrics. To see the result, clickMLflow UIin the workbench.To compare the metrics of each worker, you can select all workers and then click
compare